Whether you have one or multiple departments and payment items - you can manage them instantly. Additionally, you can CLONE existing items to add new payment items any time.
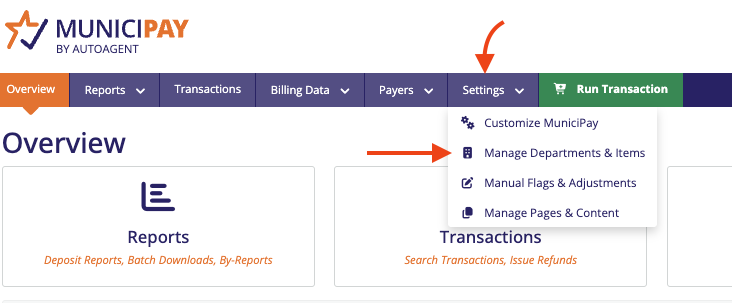
You can access these tools by navigating to your MuniciPay menu and selecting “Manage Departments & Items” under the “Settings” dropdown.
As you land on the next page, you'll find either your single department or a list of your departments listed, with an edit option available on each department to adjust the name, description, and Terms and Conditions when necessary.
To see the listen of payment items in each department, drill down with the hyperlink under each department listed: 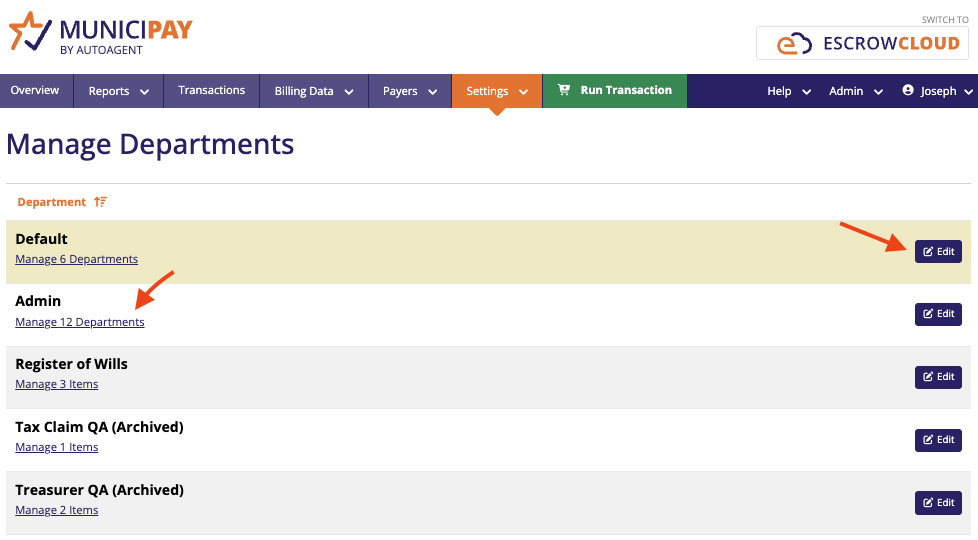
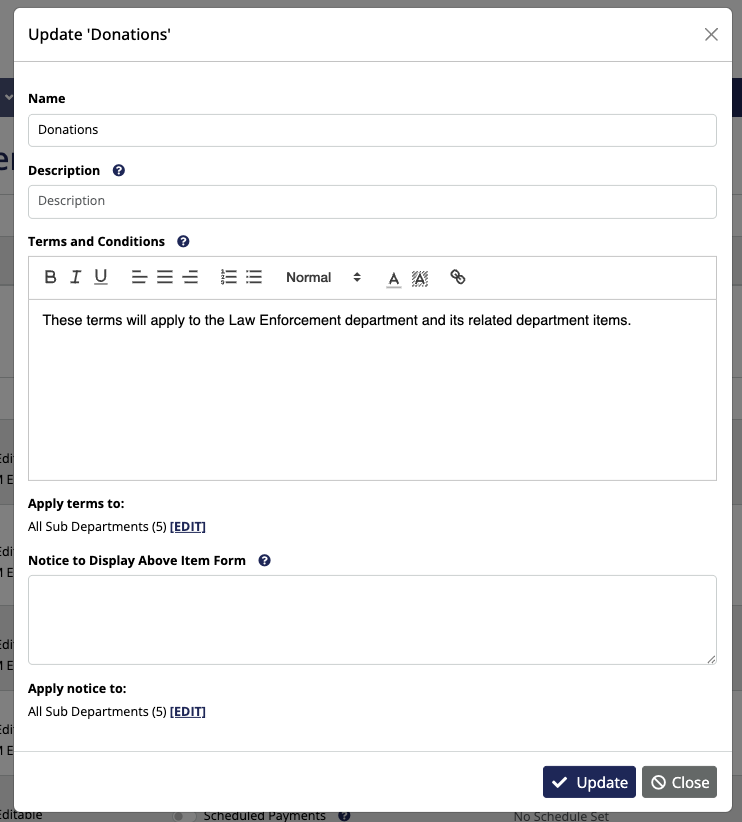
Edits made using this tool will be published directly on your customized URL, so when a resident or payer visits your link - the specific terms for that department will show: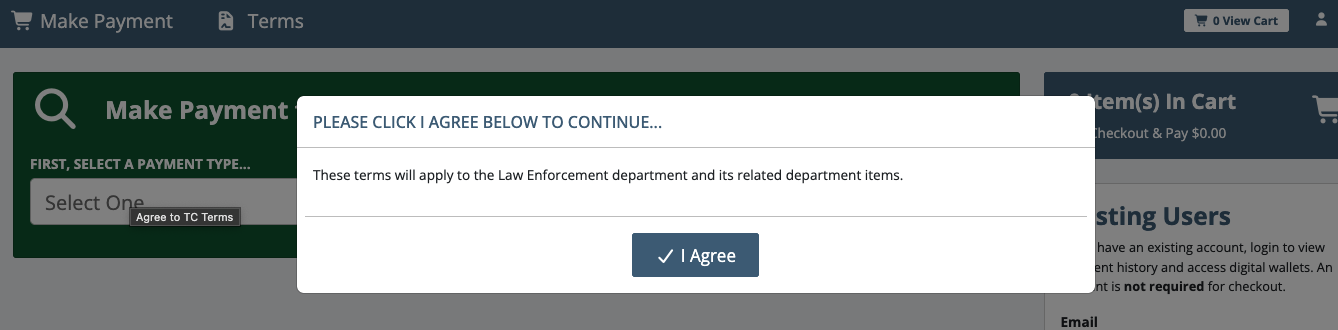
If your customized link is an "Admin" link that houses more than one of your departments, the following will be shown to the resident or payer when they visit each department in the dropdown: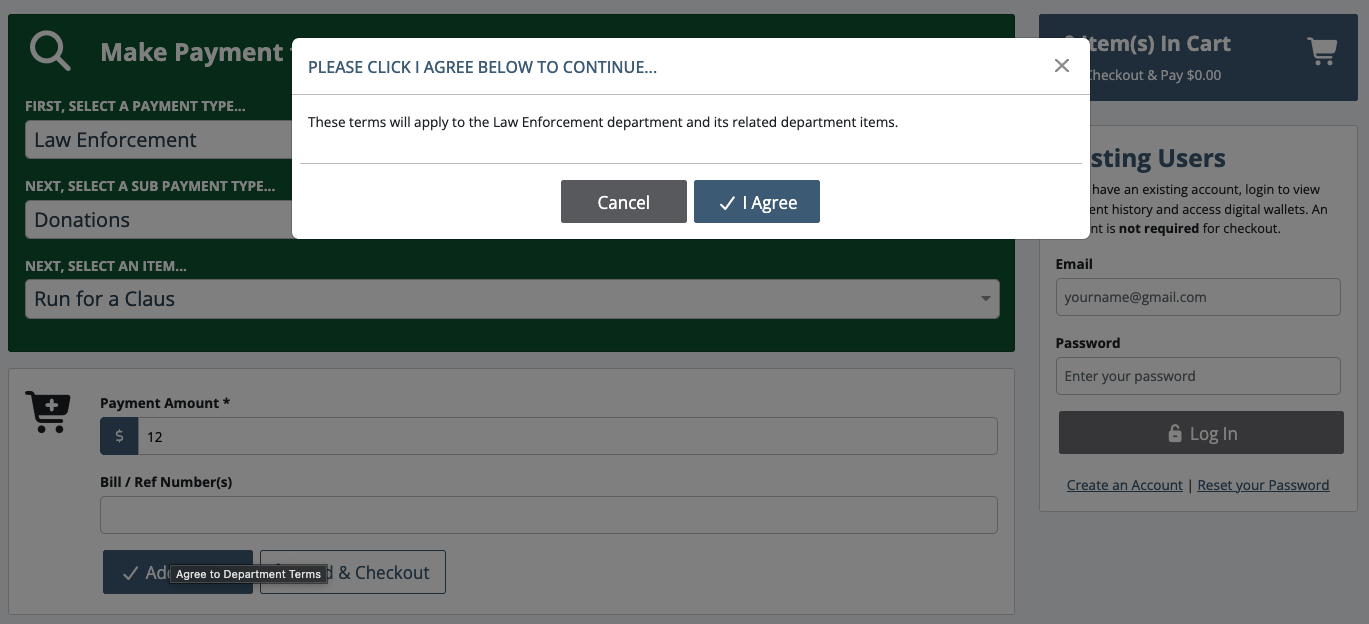
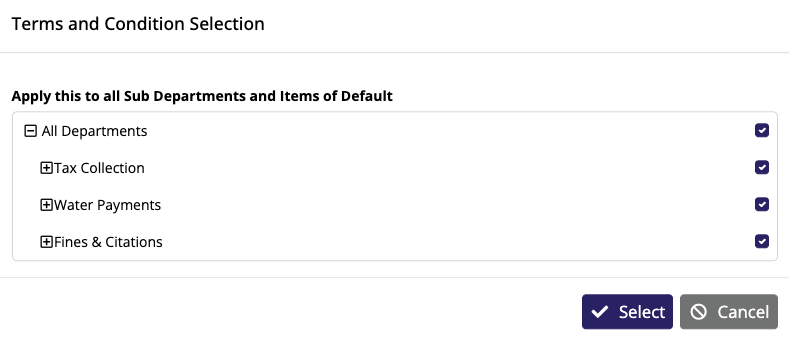
You'll also find the changes you make here can be applied to any sub-departments, with flexibility on which ones you'd like it applied to: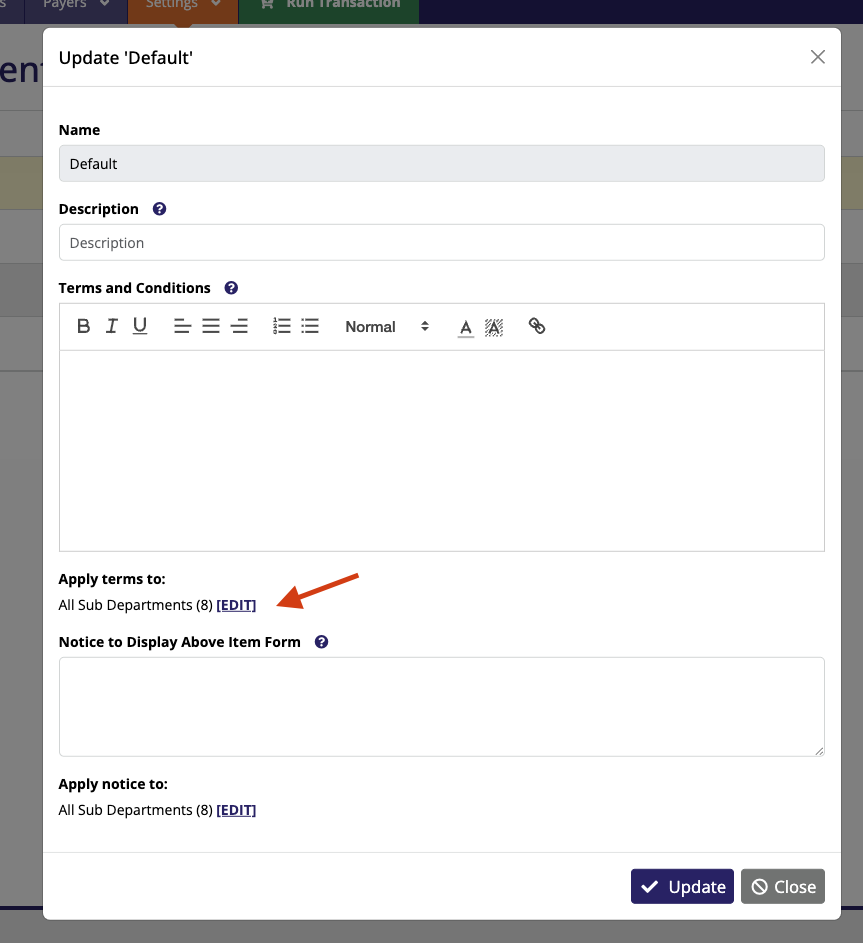

Managing Payment Items OR Creating a New Item
When you drill down into the department where you wish to make changes for the payment items, you'll find existing items in that category with options to enable (or disable), adjust payment amount edibility, various features, payment types, scheduled shut offs, and the option to CLONE any existing item to create a new one. 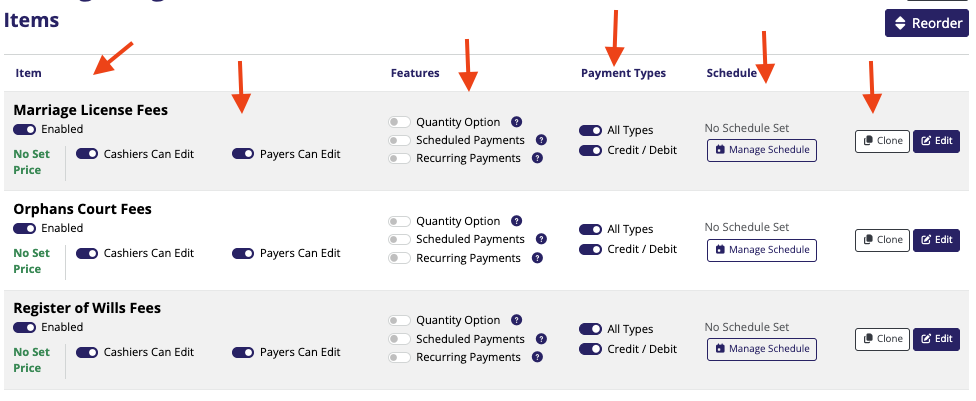
By selecting the Edit button, you can edit the following details on the individual Payment Item:
Item Name, Item Description, Item Price
- Item Name – name displayed to your payers and your reports
- Item Description – description displayed to your payers
- Item Price - designate set price for your item
Item Features
- Quantity Field – allow multiple items to be added to the cart at once
- Recurring Payments – allow payers to setup a payment scheduled
- Scheduled Payments – allow one-time payments on a scheduled date
As with the other options, clicking on the toggle of the option will switch options on/off and save your selection.
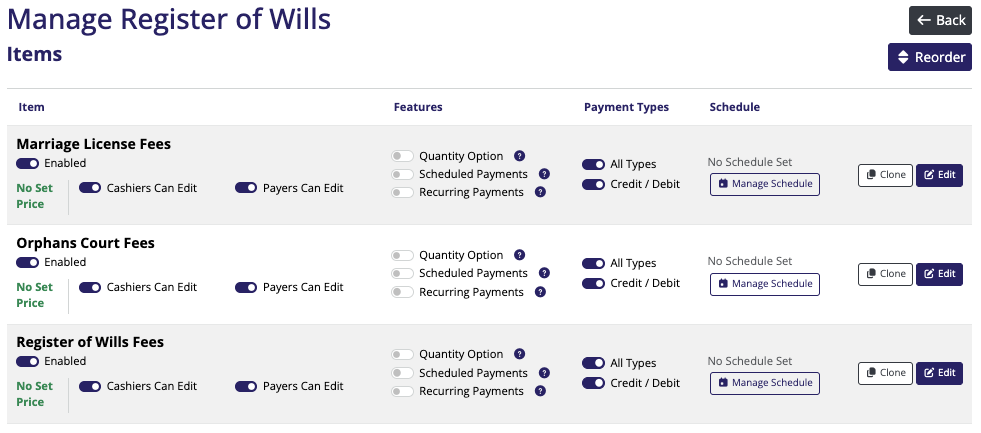
Item Status
Enable / Disable Item – allow or disable payments for the item
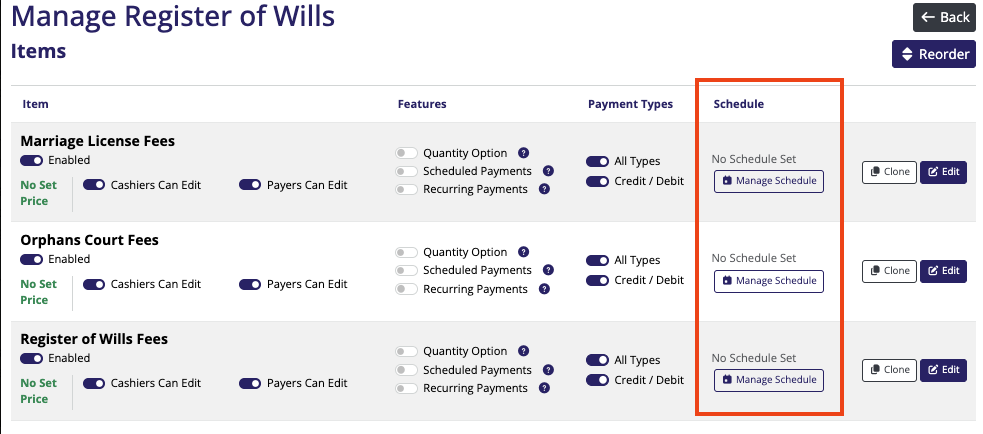
Set a Schedule to Enable / Disable Item – enable or disable an item at a given date and time
This feature is useful when it's necessary to allow or stop payments at pre-determined times.
To set a schedule, click on “Set Schedule” next to the Edit button.
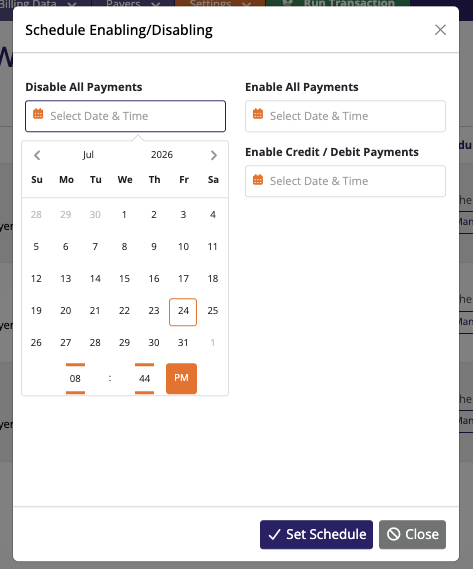
This will open a popup which will allow you to select a date and time to shut down the item and / or a date time to enable if the item has been previously disabled. Once dates are selected, click "Set Schedule".
Once an item schedule has been setup, you will see an alert across the site as a reminder of your item schedule and a link to the manage it.

Reorder Your Items
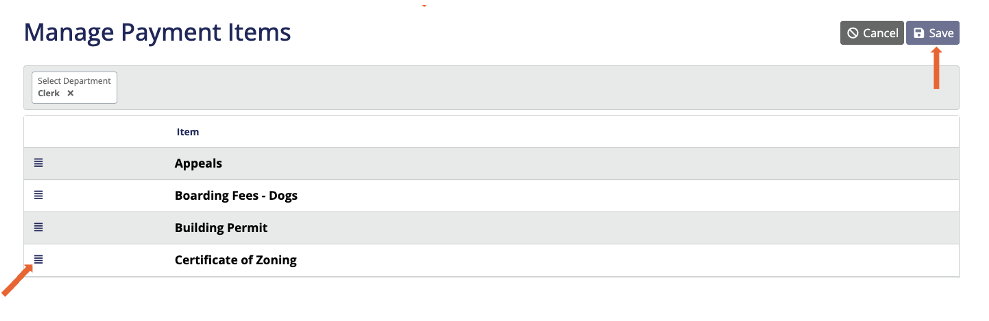
You can also edit the order of your item list by clicking the “Reorder” button.

This will allow you to drag and drop your items and preserve any order you like once you hit the “Save” button.
Was this article helpful?
That’s Great!
Thank you for your feedback
Sorry! We couldn't be helpful
Thank you for your feedback
Feedback sent
We appreciate your effort and will try to fix the article